Contents
Step 1 - Using variables
One of the most important things to understand (in any programming language) is variables. One effective way of thinking about variables is as a letter (with a label) which then has a piece of data stored inside (e.g. a number or a word). So, you can have a letter, with a label that you have assigned, which has a number inside. At a later point in your code, you can then recall this number by using the label name of your letter.
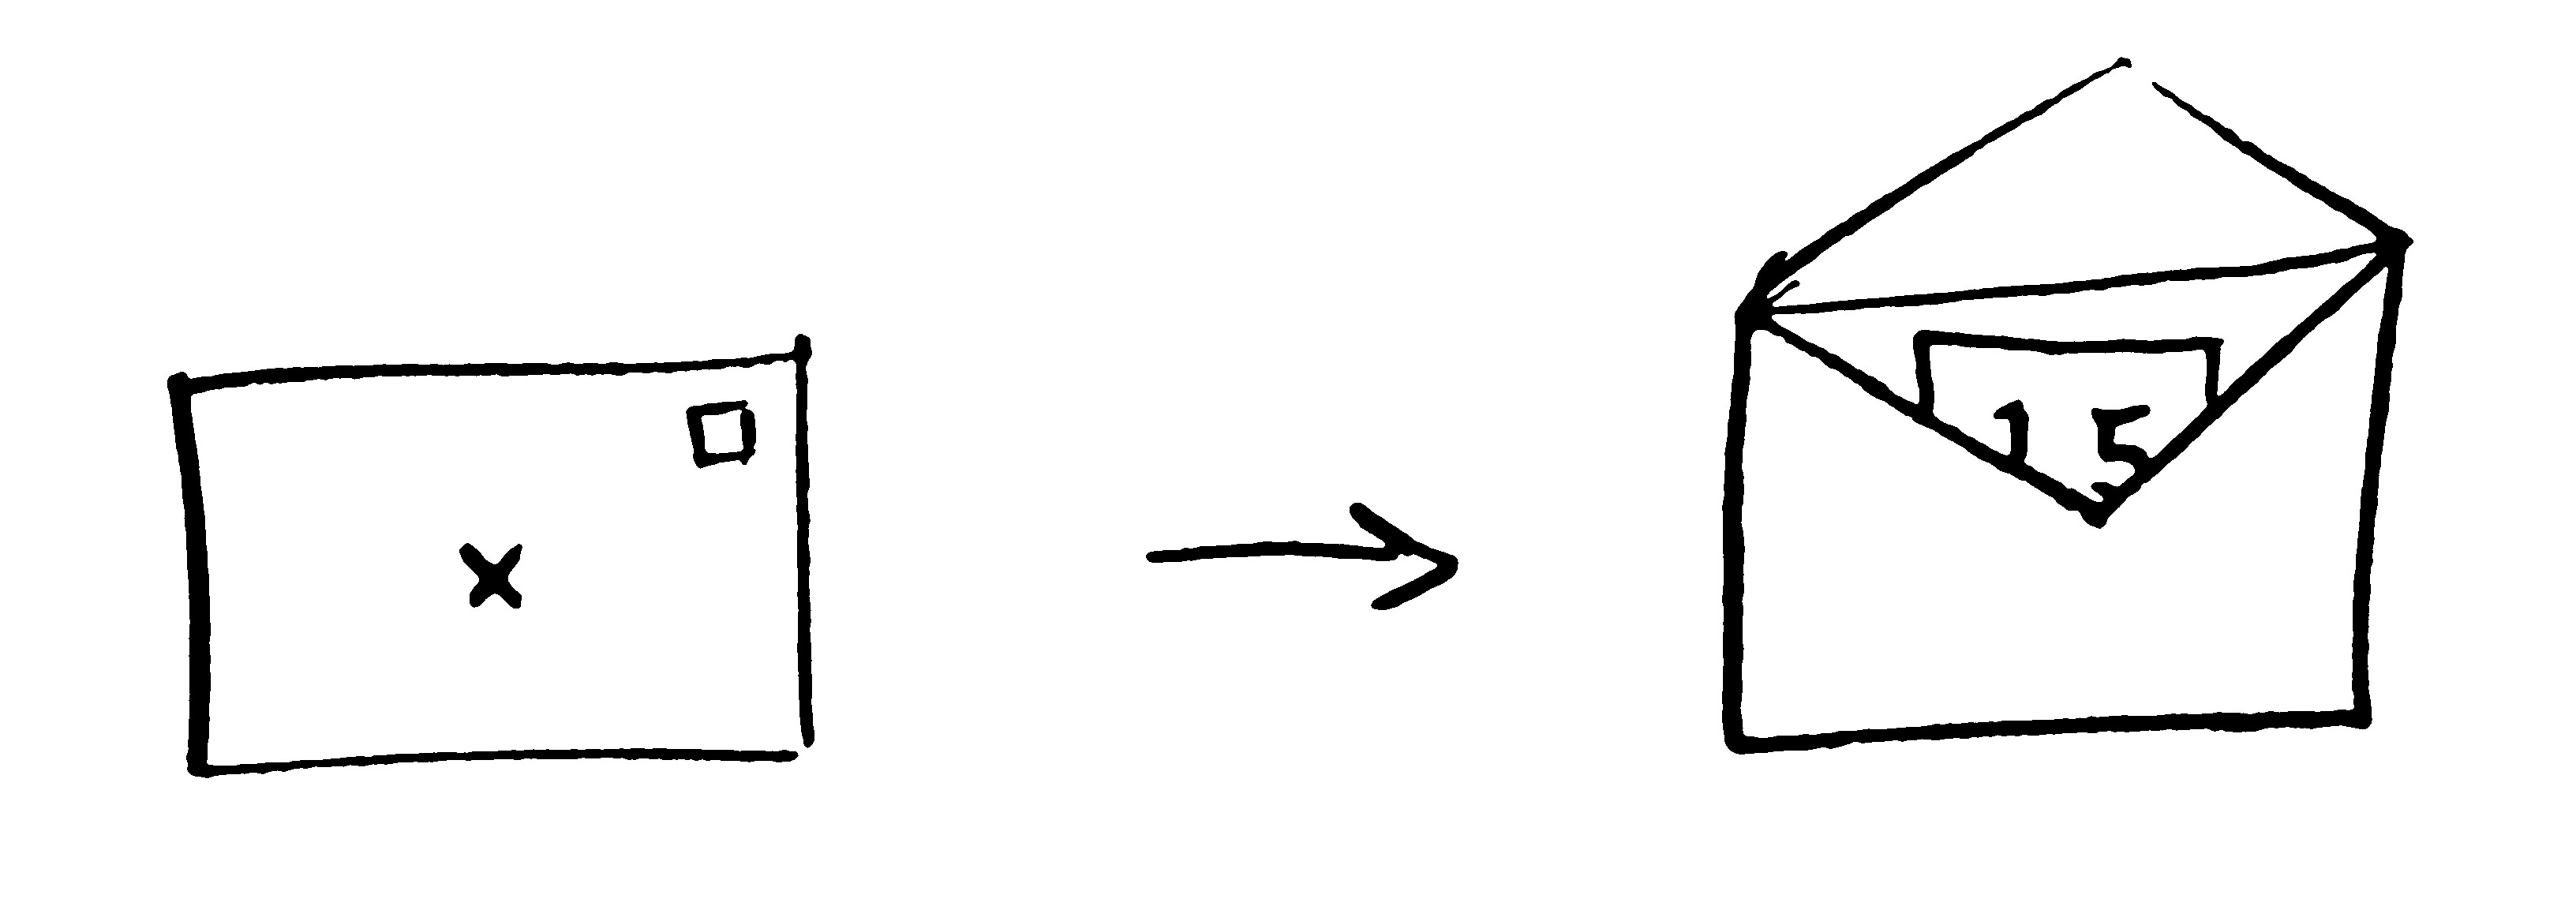
This diagram shows a variable called 'x' which has the number 15 assigned to it.
So, let's learn how to use variables in Python... In Python, it is extremely easy to declare a variable. If you want to create a variable with the name 'my_variable' with a value of 5, you simply have to write my_variable = 5. You can then use the print my_variablefunction to output this to the console. This should return the number 5 to the user.
Have a look at the code below, and see if you can work out what is going on. Once you think you know, log on to your Pi, and copy out the code. Then run the script and see if you were correct.
print 5				## Will print 5 directly to the console

my_variable = 6			## Make the variable 'my_variable' with the value 6
print my_variable		## Print 'my_variable' to the console - should print a 6

print (my_variable + 2)		## Print the value of (my_variable + 2) to the console - 8
Step 2 - Simple counter
Now, in order to interface with the 7Seg, we need to have the use of the GPIO. In order to do this, the first thing we need to write at the top of our code is import RPi.GPIO as GPIO. The as GPIOpart isn't 100% necesary, but it makes things a bit neater when we have to reference the library later on. The other library we will have to import is the time library... import time.
The first little bit of setup we have to do is to write GPIO.setmode(GPIO.BOARD), this tells the program that we are using the 'board' pin layout, which are the numbers as labeled on the Raspberry Pi itself. We then define two variables, which store the board pin which the 'up' and 'reset' pins are connected to. rstPin = 15, and upPin = 7. This makes the code much cleaner, and easier to read, as when we want to change the status of these pins, we can refer to them via the variable name instead of the pin number. To finish off the setup, we need to write GPIO.setup(rstPin, GPIO.OUT), and GPIO.setup(upPin, GPIO.OUT). This simply tells the Pi that both of these pins (7 and 15), will be used as outputs.
Again, have a look at the code below, and try to interpret what may happen. Bear in mind, that when using the 7Seg, you only need to turn the pin on and off, to send a little pulse... Like very simple morse code.
import RPi.GPIO as GPIO			## Import GPIO library
import time				## Import the time library used for delays
GPIO.setmode(GPIO.BOARD)		## Use board pin numbering - This should help insure compatability accross different RPi board revisions
rstPin = 15				## The GPIO pin which connects to the reset for the 7Seg
upPin = 7				## The GPIO pin which connects to the increment pin on the 7Seg
GPIO.setup(rstPin, GPIO.OUT)		## Setup the GPIO as an output
GPIO.setup(upPin, GPIO.OUT)		## Setup the GPIO as an output

					## This little block creates a pulse on the 'reset' pin
GPIO.output(rstPin,True)		## Set the 'reset' pin HIGH (on)
time.sleep(0.005)			## Wait a split second
GPIO.output(rstPin,False)		## Set the 'reset' pin LOW (off)

time.sleep(1)				## Wait a second

					## This little block creates a pulse on the 'count up' pin
GPIO.output(upPin,True)			## Set the 'count up' pin HIGH (on)
time.sleep(0.005)			## Wait a split second
GPIO.output(upPin,False)		## Set the 'count up' pin LOW (off)

time.sleep(1)				## Wait a second

					## This little block creates a pulse on the 'count up' pin
GPIO.output(upPin,True)			## Set the 'count up' pin HIGH
time.sleep(0.005)			## Wait a split second
GPIO.output(upPin,False)		## Set the 'count up' pin LOW

## Repet this last block nine times...
Step 3 - For loops
When writing code, there may be instances when you want something to repeat. One way of doing this is using a 'for loop'. In Python, a for loop is defined like this for i in range(x,y):. All of the code which you then want to be repeated will be 'indented' which is how python syntax works. This means that at the beginning of every subsequent line you want to be included in the for loop, you will have to use a 'tab'. Another useful aspect of the for loops, which is not demonstrated in this example is the variable i. This does not necesarily have to be the letter 'i', but it is common in examples, and it's what we have defined as shown above. This value will increase for every cycle of the loop, from x to y. This makes a for loop useful, for instance as a tool for counting up numbers. As before, have a look at the code below, try to figure out what it does then write it out yourself, and give it a whirl!
for i in range(0,10):
	print i
Now, using what we have learnt, instead of repeating the last block multiple times, we will simply pop the code for one count up cycle into a for loop, as shown below...
##  This is part of the tutorial series for the 7Seg LED Dispaly
##  For more information please contact the author, Tom Garry
##  http://7seg.co.uk   http://tomgarry.co.uk

import RPi.GPIO as GPIO			## Import GPIO library
import time				## Import the time library used for delays
GPIO.setmode(GPIO.BOARD)		## Use board pin numbering - This should help insure compatability accross different RPi board revisions
rstPin = 15				## The GPIO pin which connects to the reset for the 7Seg
upPin = 7				## The GPIO pin which connects to the increment pin on the 7Seg
GPIO.setup(rstPin, GPIO.OUT)		## Setup the GPIO as an output
GPIO.setup(upPin, GPIO.OUT)		## Setup the GPIO as an output

					## This little block creates a pulse on the 'reset' pin
GPIO.output(rstPin,True)		## Set the 'reset' pin HIGH
time.sleep(0.005)			## Wait a split second
GPIO.output(rstPin,False)		## Set the 'reset' pin LOW

for i in range(0,9):			## Repeat 9 times

	time.sleep(1)			## Wait a second

					## This little block creates a pulse on the 'count up' pin
	GPIO.output(upPin,True)		## Set the 'count up' pin HIGH
	time.sleep(0.005)		## Wait a split second
	GPIO.output(upPin,False)	## Set the 'count up' pin LOW
Step 4 - Defining functions
The last main aspect to this tutorial is how to define functions in python, these allow you to call a snippet of code, time and time again, whilst not having to repeat anything in a laborious way. A function can also have different parameters, which allows the output to be dependant on the input, for example...
def say_hi(name):
	print "Hi " + name

say_hi("Tom")

say_hi("Garry")
Here, I have defined the function 'say_hi'. This function also has the 'name' parameter. This means, at any point in the code when you write say_hi(name), the program will then output Hi name to the console. So, in out simple counter code, we could add a 'pulse' function as shown below...
##  This is part of the tutorial series for the 7Seg LED Dispaly
##  For more information please contact the author, Tom Garry
##  http://7seg.co.uk   http://tomgarry.co.uk

import RPi.GPIO as GPIO			## Import GPIO library
import time				## Import the time library used for delays
GPIO.setmode(GPIO.BOARD)		## Use board pin numbering - This should help insure compatability accross different RPi board revisions
rstPin = 15				## The GPIO pin which connects to the reset for the 7Seg
upPin = 7				## The GPIO pin which connects to the increment pin on the 7Seg
GPIO.setup(rstPin, GPIO.OUT)		## Setup the GPIO as an output
GPIO.setup(upPin, GPIO.OUT)		## Setup the GPIO as an output

def pulse(pin):				## This block defined the function 'pulse'
	GPIO.output(pin,True)		## Set the specified pin HIGH
	time.sleep(0.005)		## Wait a split second
	GPIO.output(pin,False)		## Set the specified pin LOW

pulse(rstPin)				## Call the pulse function for the 'reset' pin

for i in range(0,9):			## Repeat 9 times

	time.sleep(1)			## Wait a second
	pulse(upPin)			## Call the pulse function for the 'count up' pin
Conclusion
Again, I hope the contents of this tutorial have been useful, also, please do contact me if you have any questions. Thanks, Tom.