Orders
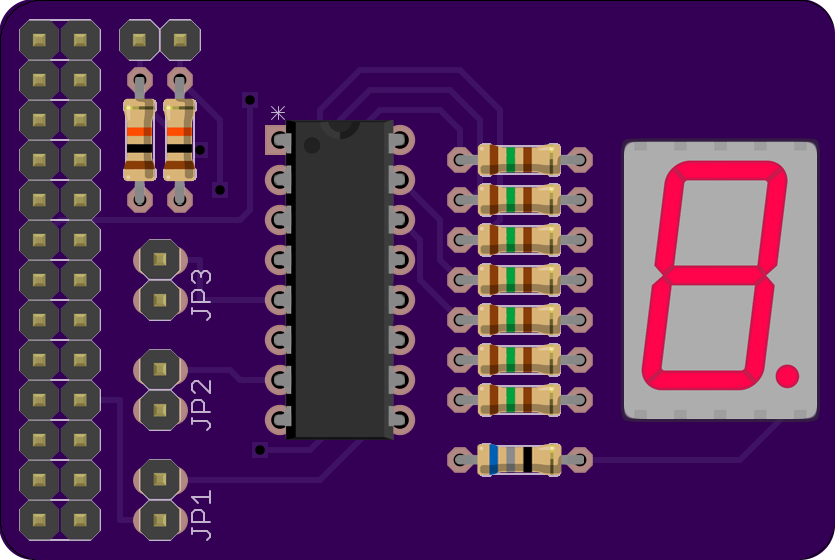
The 7Seg display for Raspberry Pi is a simple kit for people of all ages. It serves well as both an introduction to soldering, and an introduction to using the GPIO on the Raspberry Pi. It enables you to output numbers to a display on top of your Pi, this could be used to display anything, from the number of emails in your inbox, to using it as a digital dice. The kit includes all of the components, and the PCB (Circuit Board), necessary to communicate with and drive the 7Seg display. It also has a small form factor, which fits neatly across the bottom of the Raspberry Pi. The display is available in green or red LEDs and also sports a range of tutorials available on the tutorials page.
.jpg)
Concept
The idea first came about when I was thinking about a project of mine. I wanted to be able to display my score from a game which I was playing on the Pi onto a 7-Seg display. I started using a breadboard to do this, but I soon ended up with a rather large setup. The 7Seg for Raspberry Pi makes this amazingly simple and compact, so anyone, no matter how inexperienced can easily and neatly output numbers to an LED display.
.jpg)
Who Is It For?
The 7Seg for Raspberry Pi has been designed from the ground up to be accessible to people of all ages and abilities. The kit uses high quility components, and uses gold plated PCBs to help make soldering easy. All you need to get started is the kit, a soldering iron, a length of solder, and a Raspberry Pi.
Will any soldering iron be OK?
YES! This kit uses components suitable for anyone to solder. Here are some suitable soldering irons:
Draper Soldering Iron Kit
Silverline Soldering Iron (Iron only)
.jpg)
Instructions
We have a neat, easy to follow instruction set available documenting a build. This is available on-line and will guide you through the soldering process, and be followed up with some example projects.
The 7Seg should be compatible with any program on the Raspberry Pi which can access the GPIO. This means you can use absolutely anything, from Scratch, to a simple script with a web interface. Again, we will try to make as many mini tutorials as possible, but as with anything, we are sure that the community will come up with loads more ideas.
.jpg)
Technical Stuff
We have now decided to make an easy to follow schematic available, to help people advance, and make progress with the 7Seg.
Schematics
Here is a link to the 40110IC Datasheet
Data Sheet
.jpg)
Thank you for looking. If you are interested, please contact tom@7seg.co.uk, and I will respond as soon as I can!